Sunday, February 28, 2010

No-Knead Bread


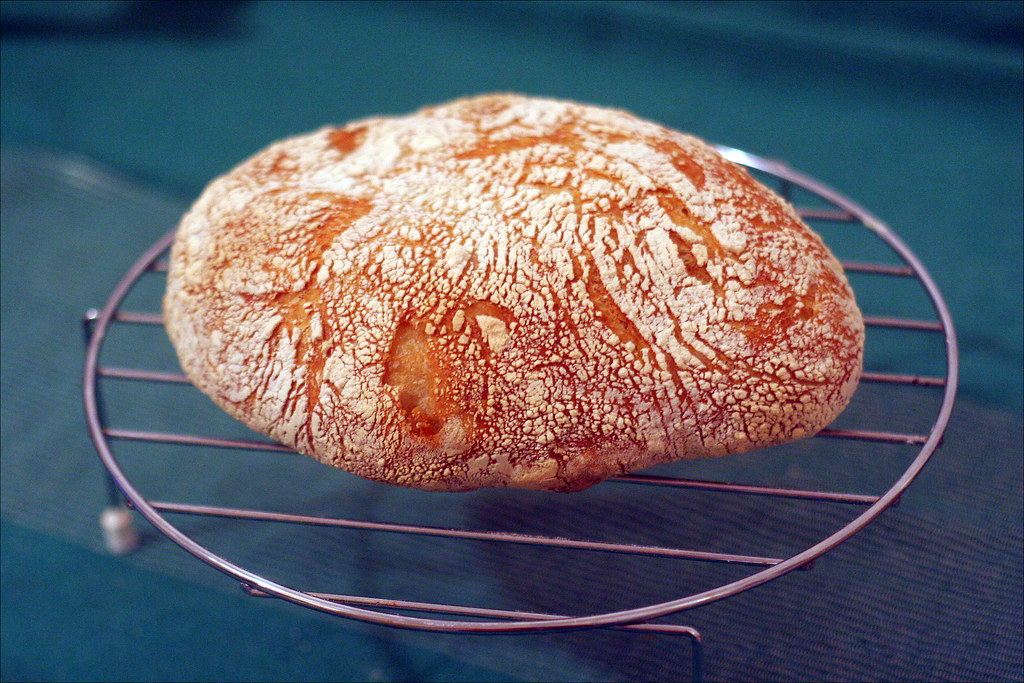
Homemade bread is a delicious yet elusive creature, and it impresses the hell out of people if you can make it yourself.  Enter: No-Knead Bread.  Not only is the recipe kneadless, but it only requires 3 ingredients (plus water).  After scoping out this video of Jim Lahey from Sullivan Street Bakery busting out the easiest bread recipe I've ever seen (and the tag section for the bread on flickr), my lazy self was sold on the idea.

No Knead Bread by Jim Lahey (New York Times)
Time: About 1½ hours plus 14 to 20 hours’ rising
Ingredients


3 cups all-purpose or bread flour, more for dusting
¼ teaspoon instant yeast
1¼ teaspoons salt
Cornmeal or wheat bran as needed. (I used flour)

1. In a large bowl combine flour, yeast and salt. Add 1 5/8 cups water, and stir until blended; dough will be shaggy and sticky. Cover bowl with plastic wrap. Let dough rest at least 12 hours, preferably about 18, at warm room temperature, about 70 degrees. (After reading many, many blog posts about this bread, I 1) only used 1 1/2 cups water and 2) let it sit for at least 18 hours.  Both of these points helped the dough not be too runny when I needed (pun!) to form it into a semi-ball shape.)


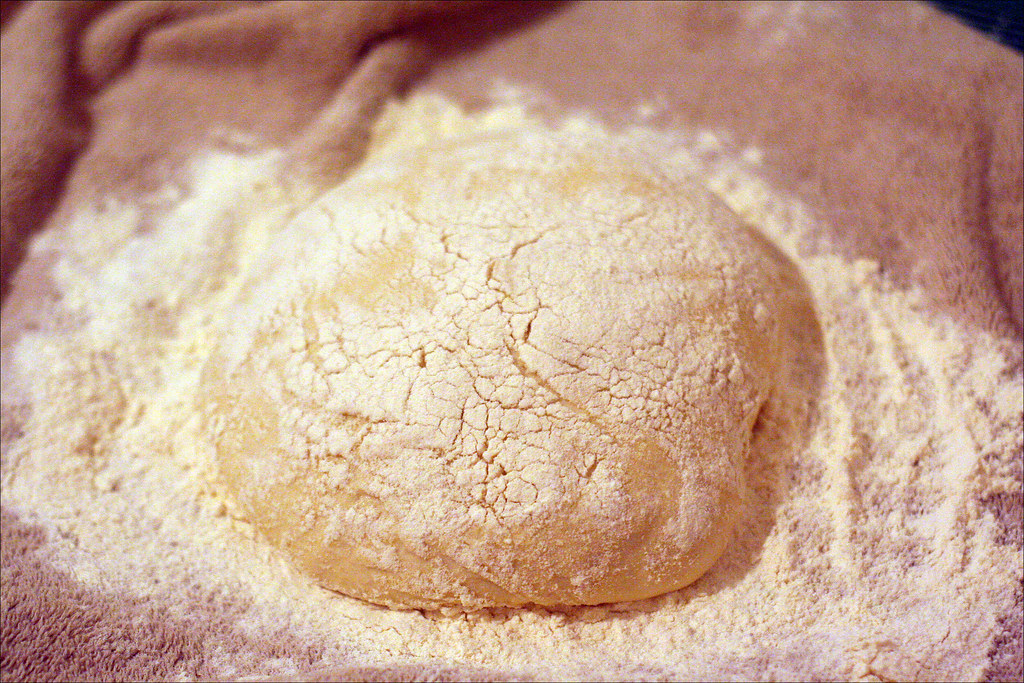
2. Dough is ready when its surface is dotted with bubbles. Lightly flour a work surface and place dough on it; sprinkle it with a little more flour and fold it over on itself once or twice. Cover loosely with plastic wrap and let rest about 15 minutes. (Cover your hands in flour!  This junk is STICKY!)


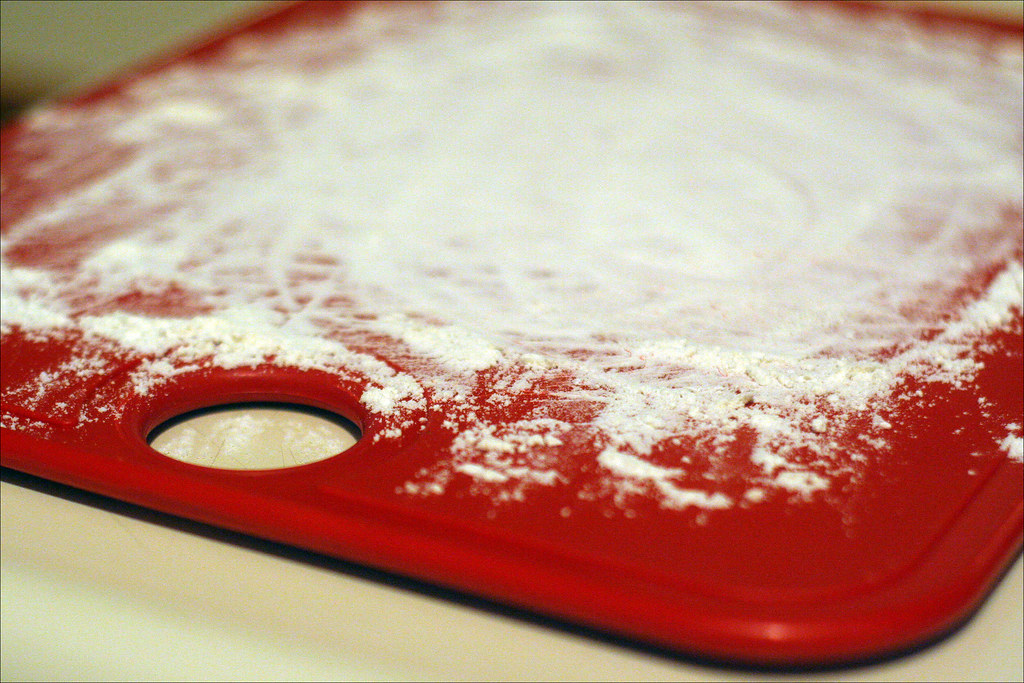
3. Using just enough flour to keep dough from sticking to work surface or to your fingers, gently and quickly shape dough into a ball. Generously coat a cotton towel (not terry cloth) with flour, wheat bran or cornmeal; put dough seam side down on towel and dust with more flour, bran or cornmeal. Cover with another cotton towel and let rise for about 2 hours. When it is ready, dough will be more than double in size and will not readily spring back when poked with a finger. (I just used flour to keep things easy, and I didn't want a gnarly hard crust.  And a whole separate towel isn't needed, just fold the ends over the top of the dough.)


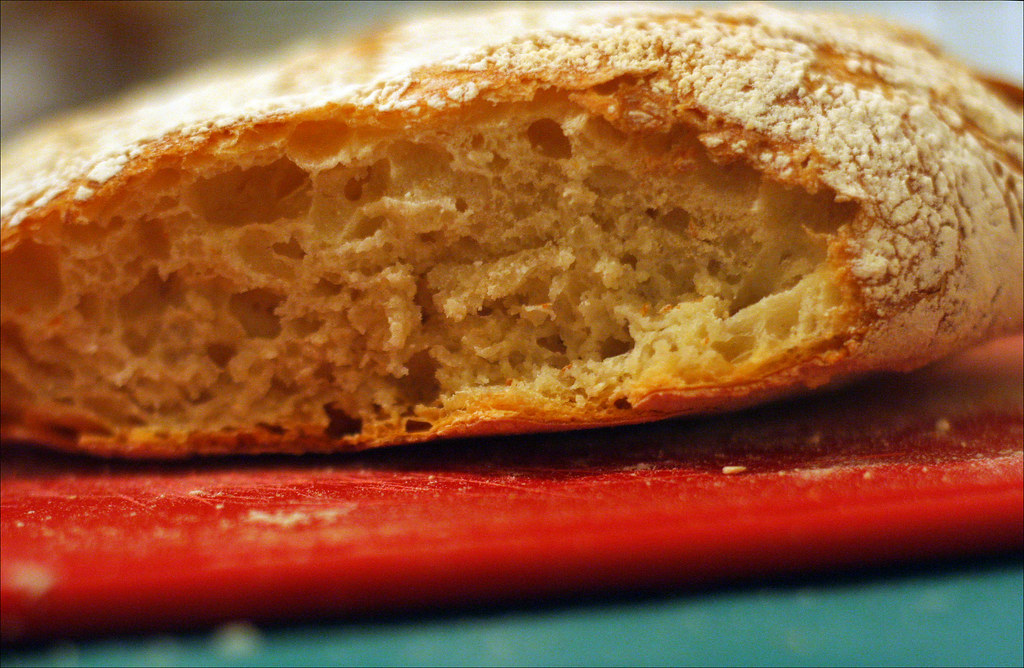
4. At least a half-hour before dough is ready, heat oven to 450 degrees. Put a 6- to 8-quart heavy covered pot (cast iron, enamel, Pyrex or ceramic) in oven as it heats. When dough is ready, carefully remove pot from oven. Slide your hand under towel and turn dough over into pot, seam side up; it may look like a mess, but that is O.K. Shake pan once or twice if dough is unevenly distributed; it will straighten out as it bakes. Cover with lid and bake 30 minutes, then remove lid and bake another 15 to 30 minutes, until loaf is beautifully browned. Cool on a rack. (The only pot I had that could be put in the oven was the XL long guy, which made my loaf long and skinny.  If you have a round pot, stick with that so the slices will be wider and can be used for sandwiches.)


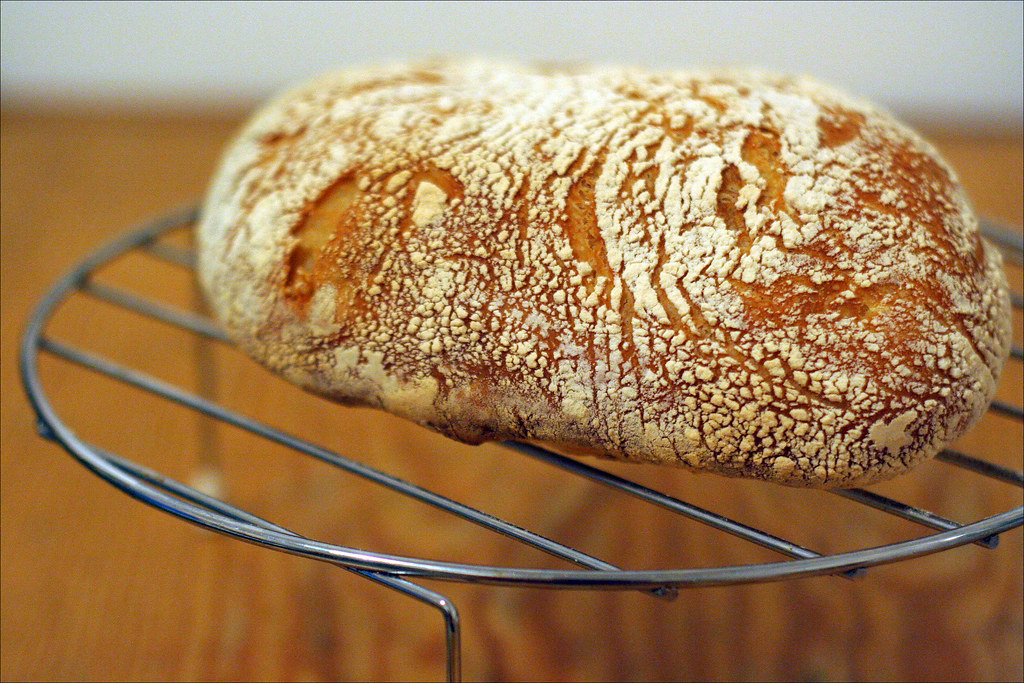
Yield: One 1½-pound loaf.

Seriously, this bread could not be easier.  If you are low on cash (aren't we all??), invest in a bag of flour and a couple packets of yeast and you'll be enjoying fresh bread for months for only a few bucks. Goes great with honey, olive oil & balsamic vinegar, dipped in soup, sammies...  I already have another pile of dough rising right now.  Enjoy!

Sunday, February 14, 2010

Green Media Breakfast Project: Fruit Salad with Feta & Mint


Last Friday, my Green Media class shared our first meal together with the Breakfast Project.  Each student was required to bring in a dish that they had made for everyone to try, creating a 13 dish buffet.

It. Was. Amazing.

Pancakes were made ON THE SPOT.  With a grill.  In the classroom.

Any doubts I had about taking a Friday class (my first one in years, and at 9:40am, no less) melted away as soon as I saw Marco start flipping over those gorgeous circles of fluffy batter.

Besides hot off the grill pancakes, there was also a cheese souffle, home made bagels (I didn't even know what was possible), cinnamon rolls (still warm), a blueberry lime bunt cake, vegan lemon scones, corn beef hash, and more.  Like, twice as much more.

When planning our contributions the week before, I immediately volunteered to make this gorgeous citrus salad with feta and mint that I had recently seen on one of my favorite food blogs, Smitten Kitchen by Deb.  I was sold on the idea after seeing just one photo (and the inclusion of feta, which I could eat by the spoonful), as well as the fact that it seemed simple enough.  Cut citrus, sprinkle feta.  Well...


Little did I know that cutting the citrus into those perfect little ninja stars did, in fact, require the actual knife skills of a ninja.  While I did manage to get one grapefruit and two oranges adequately severed, I also had to throw out another three pieces of fruit because of poor quality (taste-wise, not just because they looked janky as hell, which they did).  Defeated by the tricky citrus, I booked it to Trader Joes to grab a few tired and true items I knew would still be just as delicious and not make me cry because they looked OK but tasted like barf.


=


Mixed Fruit Salad with Feta and Mint
(adjusted recipe from Smitten Kitchen)
- Fruits of choice:
1 grapefruit
2 oranges
1/2 honeydew melon
1 green apple
1 pear
5 small plums
1 peach
- 1/4 - 1/2 cup crumbled feta (depending on size of salad)
- 1 - 2 tablespoons fresh mint (depending on size of salad)
- juice of 1 lime (optional)
- 1/4 cup orange juice (optional)
- 1 tablespoon honey

1. Cut up the fruit.  For citrus ninja stars: cut off each end of the piece of fruit, then set it on one of the now flat ends.   Cut off the sides in vertical pieces, cutting from top to bottom.  After removing all remaining skin, lay the fruit on its side and cut it into 1/4" thick wheels.


2. Add pieces of fruit to platter or bowl of choice.  For extra pizazz, I recommend putting the citrus ninja stars on the top.


3. In the Smitten Kitchen version of this salad, there is a savory dressing included.  Since I was making this for breakfast, my "dressing" consisted of drizzling orange juice, lime juice, and some honey on the top.  I felt like the added sweetness and moisture was necessary because some of the fruit wasn't as ripe as I would have liked.  This step is totally optional, and you can wing it with whatever juice you have handy (e.g. lemonade, pomegranate).

4.  Before serving, sprinkle feta and mint on top.  I would not to this too far ahead (I made mine the night before and did this step before going to class) because a) the feta will get soggy and b) the aroma of the mint seeps into the fruit VERY quickly.


5. Dig in.